Friday, October 25, 2013

Fungus Foray – an Artist’s Palette Underground

Fungus Foray – an Artist’s Palette Underground            
 by Judith Towers


  1. Mushroom foray
  2. What we collected (small amounts, not enough for dyeing)
  3. Hydnelllum aurantiacum – can make teals and blue-greens
  4. Tapinella atrotomentosus – blue-greens and occasionally purples
  5. Susan Hopkins’ samples
  6. Many shades of Inonotus hispidus and Phaeolus schweinitzii
  7. Hapilopilus nidulans - purple
  8. Basket full of mushroom-dyed colors!

In September a friend and I ventured to The Mannings, a handweaving and handspinning shop in East Berlin, Pennsylvania. We were about to discover that hidden colors may be found in many mushrooms. Susan Hopkins was our mentor. She has studied mushroom identification and dyeing with mushrooms and teaches a number of classes on this fascinating and unusual subject.

We learned how to chop the mushrooms in small pieces, simmer them in a pot of hot water at 170°F, strain out the mushroom pieces and place skeins of wool into the pot. The skeins had been pretreated with a mordant such as alum to allow the color to permeate the wool fibers. If a mordant is not used, the color will not be as permanent or as bright. Using other mordants such as iron, tin, and copper produce different colors, but in our class we used only potassium alum and iron, the safest mordants.

When the wool skeins had simmered for an hour, also at 170°, the wool was ready to rinse and hang to dry. During the 4-day workshop we worked in teams of two and made new colors each day. Each of us came home with at least 14 ounces of dyed wool yarn – enough to make a vest!

Mushrooms and other fungi are no longer classified as plants, but are considered parasites living on other organisms on which they feed, or saprophytes, obtaining their food from dead organisms such as a decaying tree stump. Some are destructive like anthracnose, which cause dogwood and other shade trees to drop their leaves. Others are beneficial, breaking down organic matter for soil improvement, for medicine, and of course, providing delicious food for us!

Recently I cooked 4 different mushrooms found in my yard and in the woods near my home. I kept four small jars of mushroom “paint” and made a small drawing, painted entirely with my mushroom watercolors! Fun – you can be sure that more paintings with fungi are on my “basket” list !


Thursday, October 24, 2013

Fascinating Fungi, Marvelous Mushrooms


By Lorie Lincoln

     Celeste Johnston recently taught a class called Fascinating Fungi, Marvelous Mushrooms at Lewis Ginter Botanical Garden.  One of the class sessions was devoted to making paper using mushrooms.  We started by ripping up various types of paper into small pieces and putting those pieces into a bottle filled with water.  We shook the bottle and waited until the water had saturated the paper pieces, then put the water and paper into a blender and made a paper pulp  'puree' .  We added some chopped mushroom pieces after the blending was done.  We poured the 'puree'  into an aluminum pan and using a deckle lined with screening scooped the paper pulp onto the deckle.  We put another screen on top and pressed as much water out of the paper pulp as we could by hand.  Then we carefully removed the pulp from the deckle and screening and pressed more chopped mushroom pieces onto the wet paper. 


    This project doesn't take lots of expensive equipment, is fairly simple though a bit messy, and was a lot of fun.  Celeste Johnston hopes to be teaching a class just on paper making at Lewis Ginter Botanical Garden this coming spring.

Tuesday, October 1, 2013

American Society of Botanical Artists, Pittsburgh, PA, 2013

by Judy Thomas


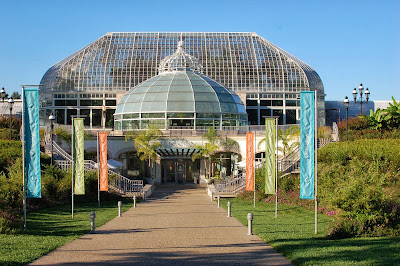
The Phipps Conservatory in Pittsburgh, PA

I attended my first American Society of Botanical Artists conference September 24-28 in Pittsburgh, PA (that includes a two-day, pre-conference workshop taught by Libbie Kyer called "Colored Pencil: Wet and Wild.")  I am full of impressions, skills, ideas and experiences I want to share, and am also totally swamped after missing a week of work and home life!  So, I will do my best and will hit what I think were the highlights of the conference.

I took the pre-conference workshop with six other colored pencil (CP) artists or those exploring the medium.  Libby had a structured approach to teaching specific materials, tools and techniques.  We first learned how to achieve deep hues (and avoid paper speckle) using a partial, black CP underpainting (yes, many CP artists call their work a "painting," not a "drawing" and yes, black!) and lightly touching it with an alcohol solvent.  The subject for this was an eggplant, though we also did studies of a pepper. Next, we worked on contours and shading, then we moved onto gestural drawing (a quick capture of the object using a graphite pencil held flat, in the tips of one's fingers). Libby stated this this does a great job in capturing the size and dimensions of the subject of study without measurement.  After a few tries, I found it worked, and it created an image with greater movement and life than my usual, more tediously and minutely-drawn subjects.  This is a technique I will use in the future. After working to find up contours and shapes, we transferred the image to our final paper and began CP work.

End of workshop review, Libby in center.

Another highpoint of the conference was the portfolio review. Any member can sign up to do this (though the total number is limited) and it demonstrated the breadth and depth of work ASBA members produce.  I came away elated, determined to improve my work and slightly intimidated by the skill on display!
Portfolio review in the Pittsburgh Athletic Center

Wow!

I also attended an educator's workshop. The presentations were geared toward teaching watercolor, but I learned a few things about skill practice and critique. I attended Wendy Hollender's "Racing Nature" class where she taught her method of quickly achieving depth of color.  Wendy often uses sepia, and other dark tones (indigo, a dark green and burgundy) for shading, and applies water color pencil and other color pencils over the top.  I used a deep purple-brown (Faber Castell Caput Mortem) for shading on my bright pink zinnia and it worked!

The last class I attended was "Complex Subjects."  The only objection I had to this class (and Wendy's class) was that three hours is too short a time to learn and practice what you have learned. The teacher, Lee McCaffree was excellent.  She showed us different ways to simplify complex forms of line, texture and form. In the class, we tried to capture the pattern of what we were drawing, to simplify it to its geometric elements, and add in details.

 Complex subjects class

Below is my attempt at a sequoia cone. See the bit of kneaded eraser on the cone? This is to mark a reference point, so I can keep track of where I am.  With a larger object, you can move the marker (a bit of tape, tack or kneaded eraser) as you go so you can track what you have already done. This cone follows a pattern of a double spiral. We also tried to draw flowers using a circular spiral or bulls-eye pattern (depending on the flower), but time was too limited to get far.


I don't have pictures of the Hunt Institute botanical art opening (a huge crush-I wish I had gone on my own). I took many photos in the Phipps Conservatory, too many to post.  I did take many photos walking around Pittsburgh, and met some interesting people (Phyllida Barlow, an installation artist who was assembling a massive installation in front of the Carnegie Art Museum http://en.wikipedia.org/wiki/Phyllida_Barlow  She is a descendant of Charles Darwin!  I also spoke to a CMU art professor, and went to a bizarre art show at the CMU student gallery).  I will leave you with a charming image of Pittsburgh, a community-grassroots art project, "Locks of Love" (for more info, see http://weburbanist.com/2011/01/12/locks-of-love-urban-padlock-monuments-to-commitment/    )


Next year Denver?